Lord Kroak in Contrast Paints - Part 1
Whilst I’ve painted 100s of miniatures over the last 18 months, I’d not yet had the bravery to pick up one of the ‘god’ models for Age of Sigmar and have a go! Well, for one of my D&D games, the DM required a mummified frog miniature and was good enough to provide one for me to paint. My usual move is to search for painting tutorials… especially with a focus on using contrast paints … but i ws surprised to see that there weren’t that many Kroak tutorials, and none that I could find that focused on using Contrast paints… This made me very nervous…
So I decided to write it all down :D
Move over Morathi, its time to get my frog on…
What it looks like
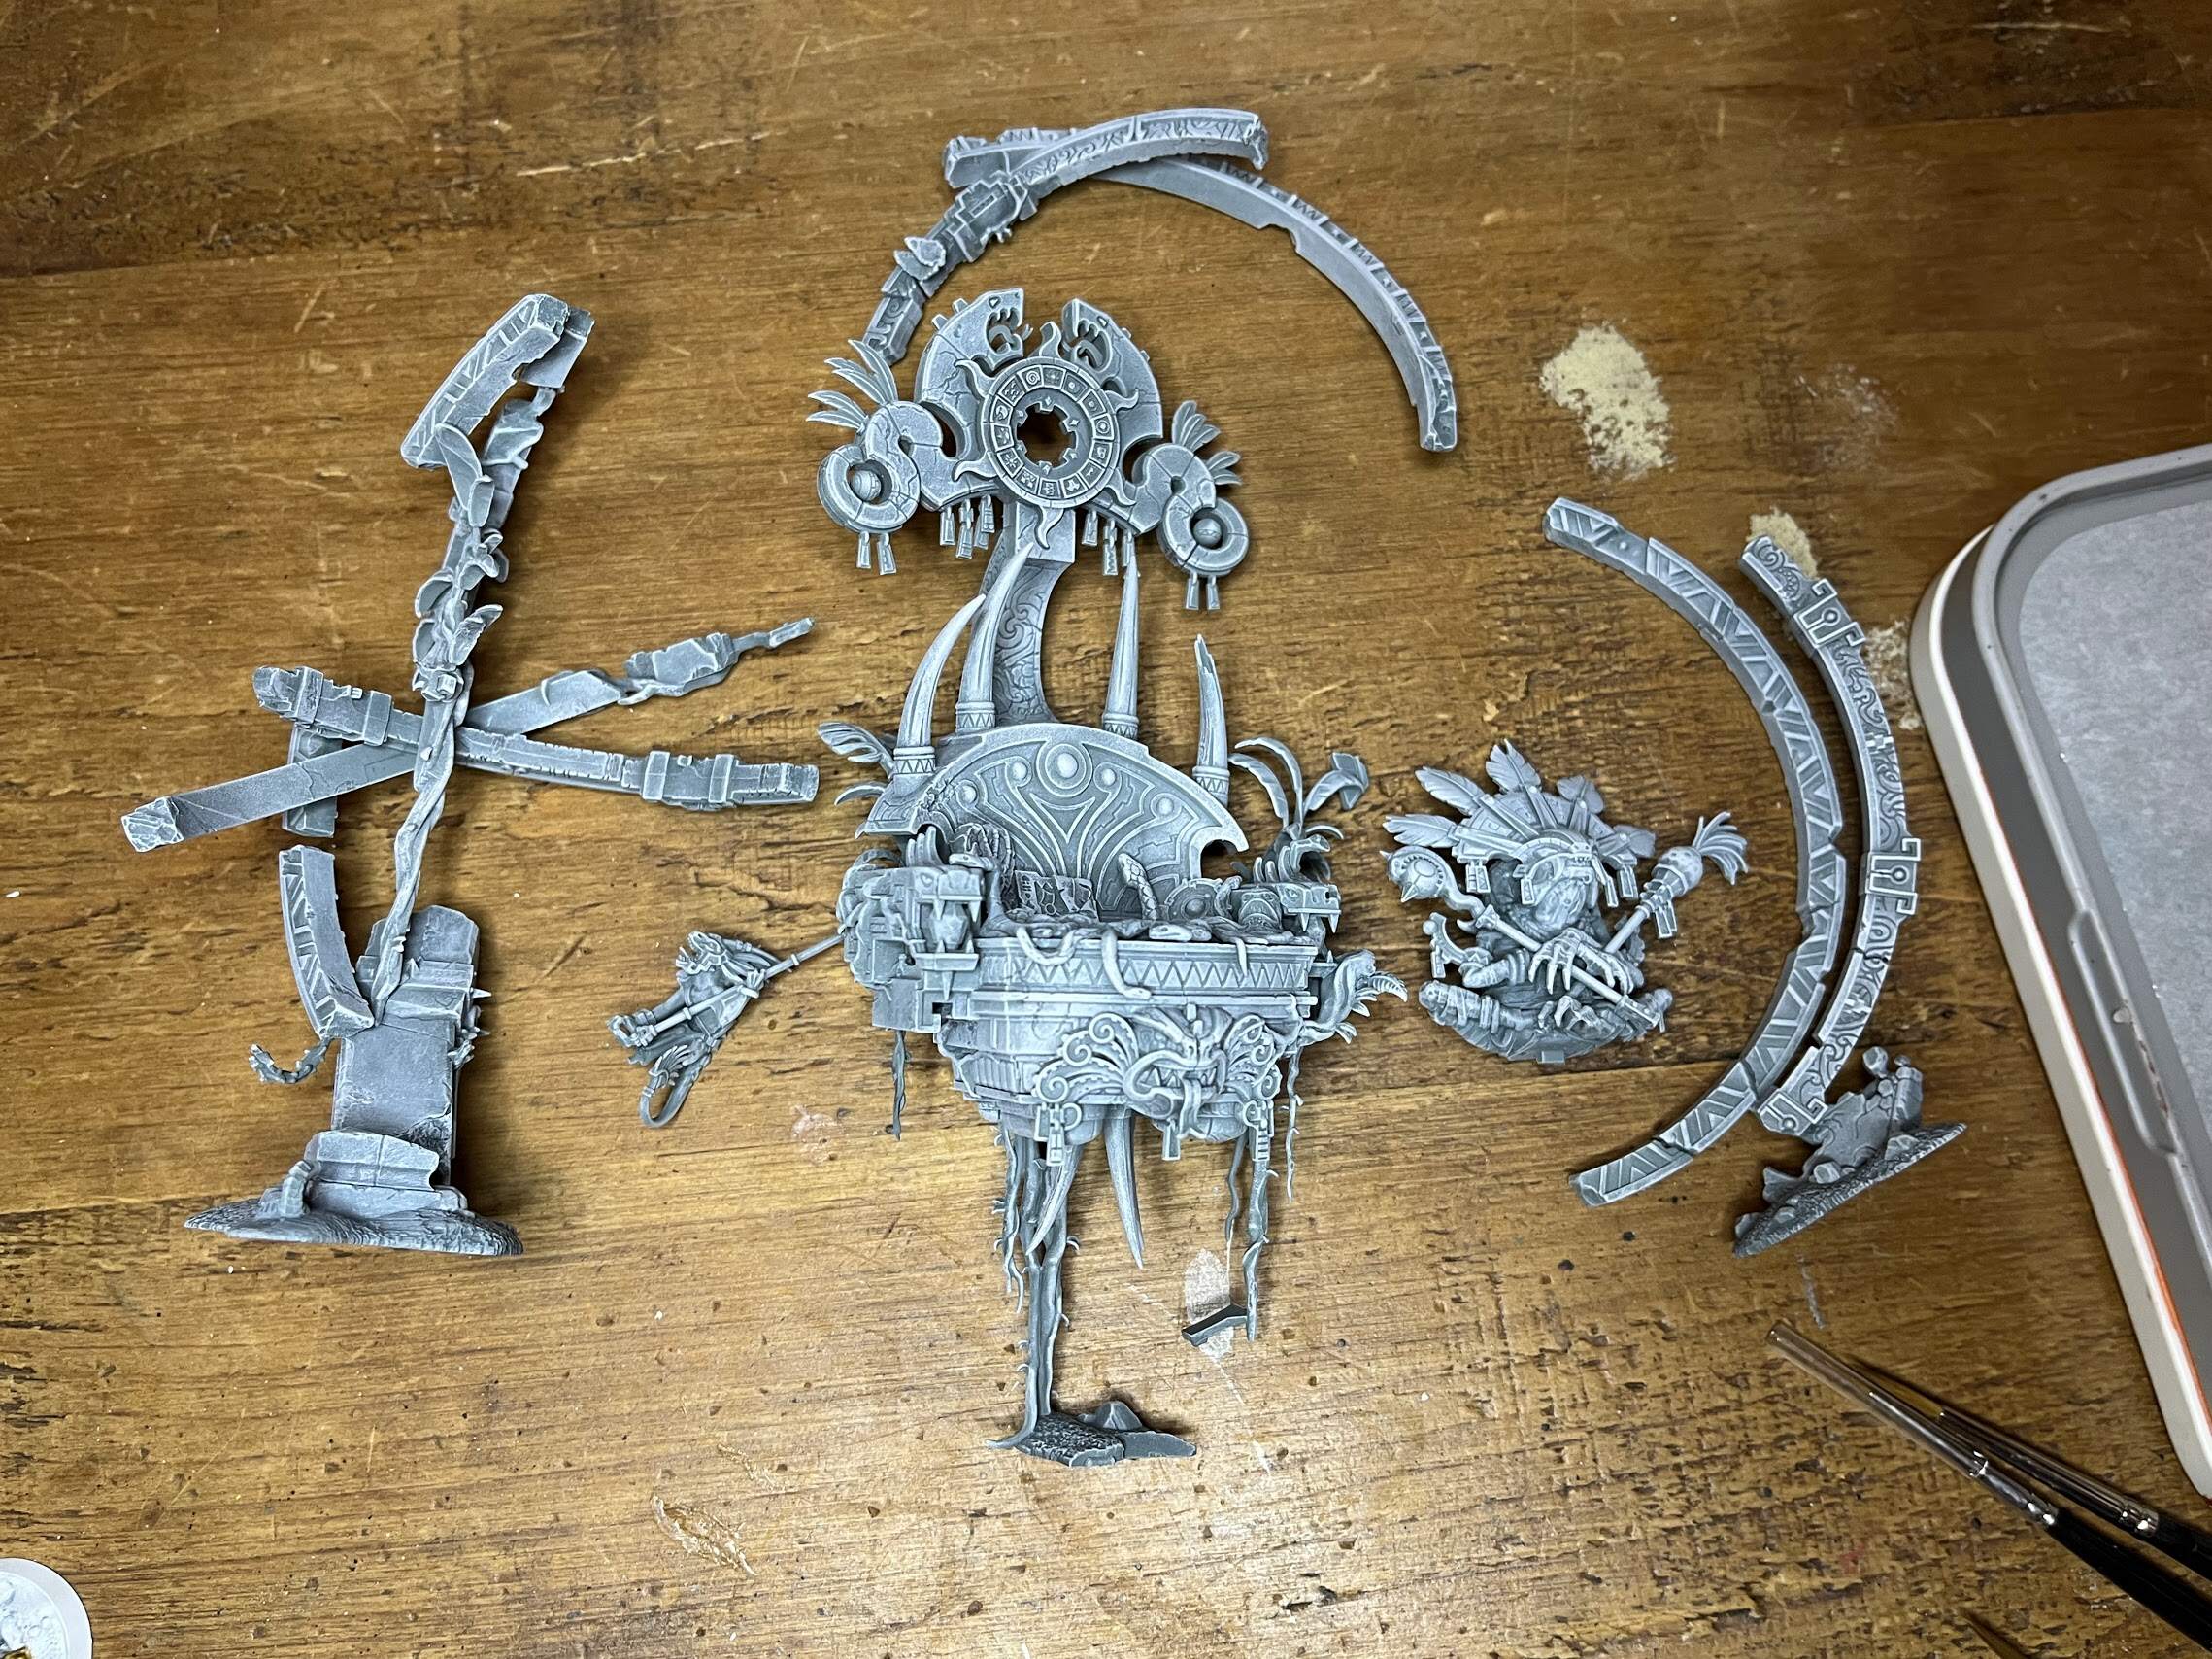
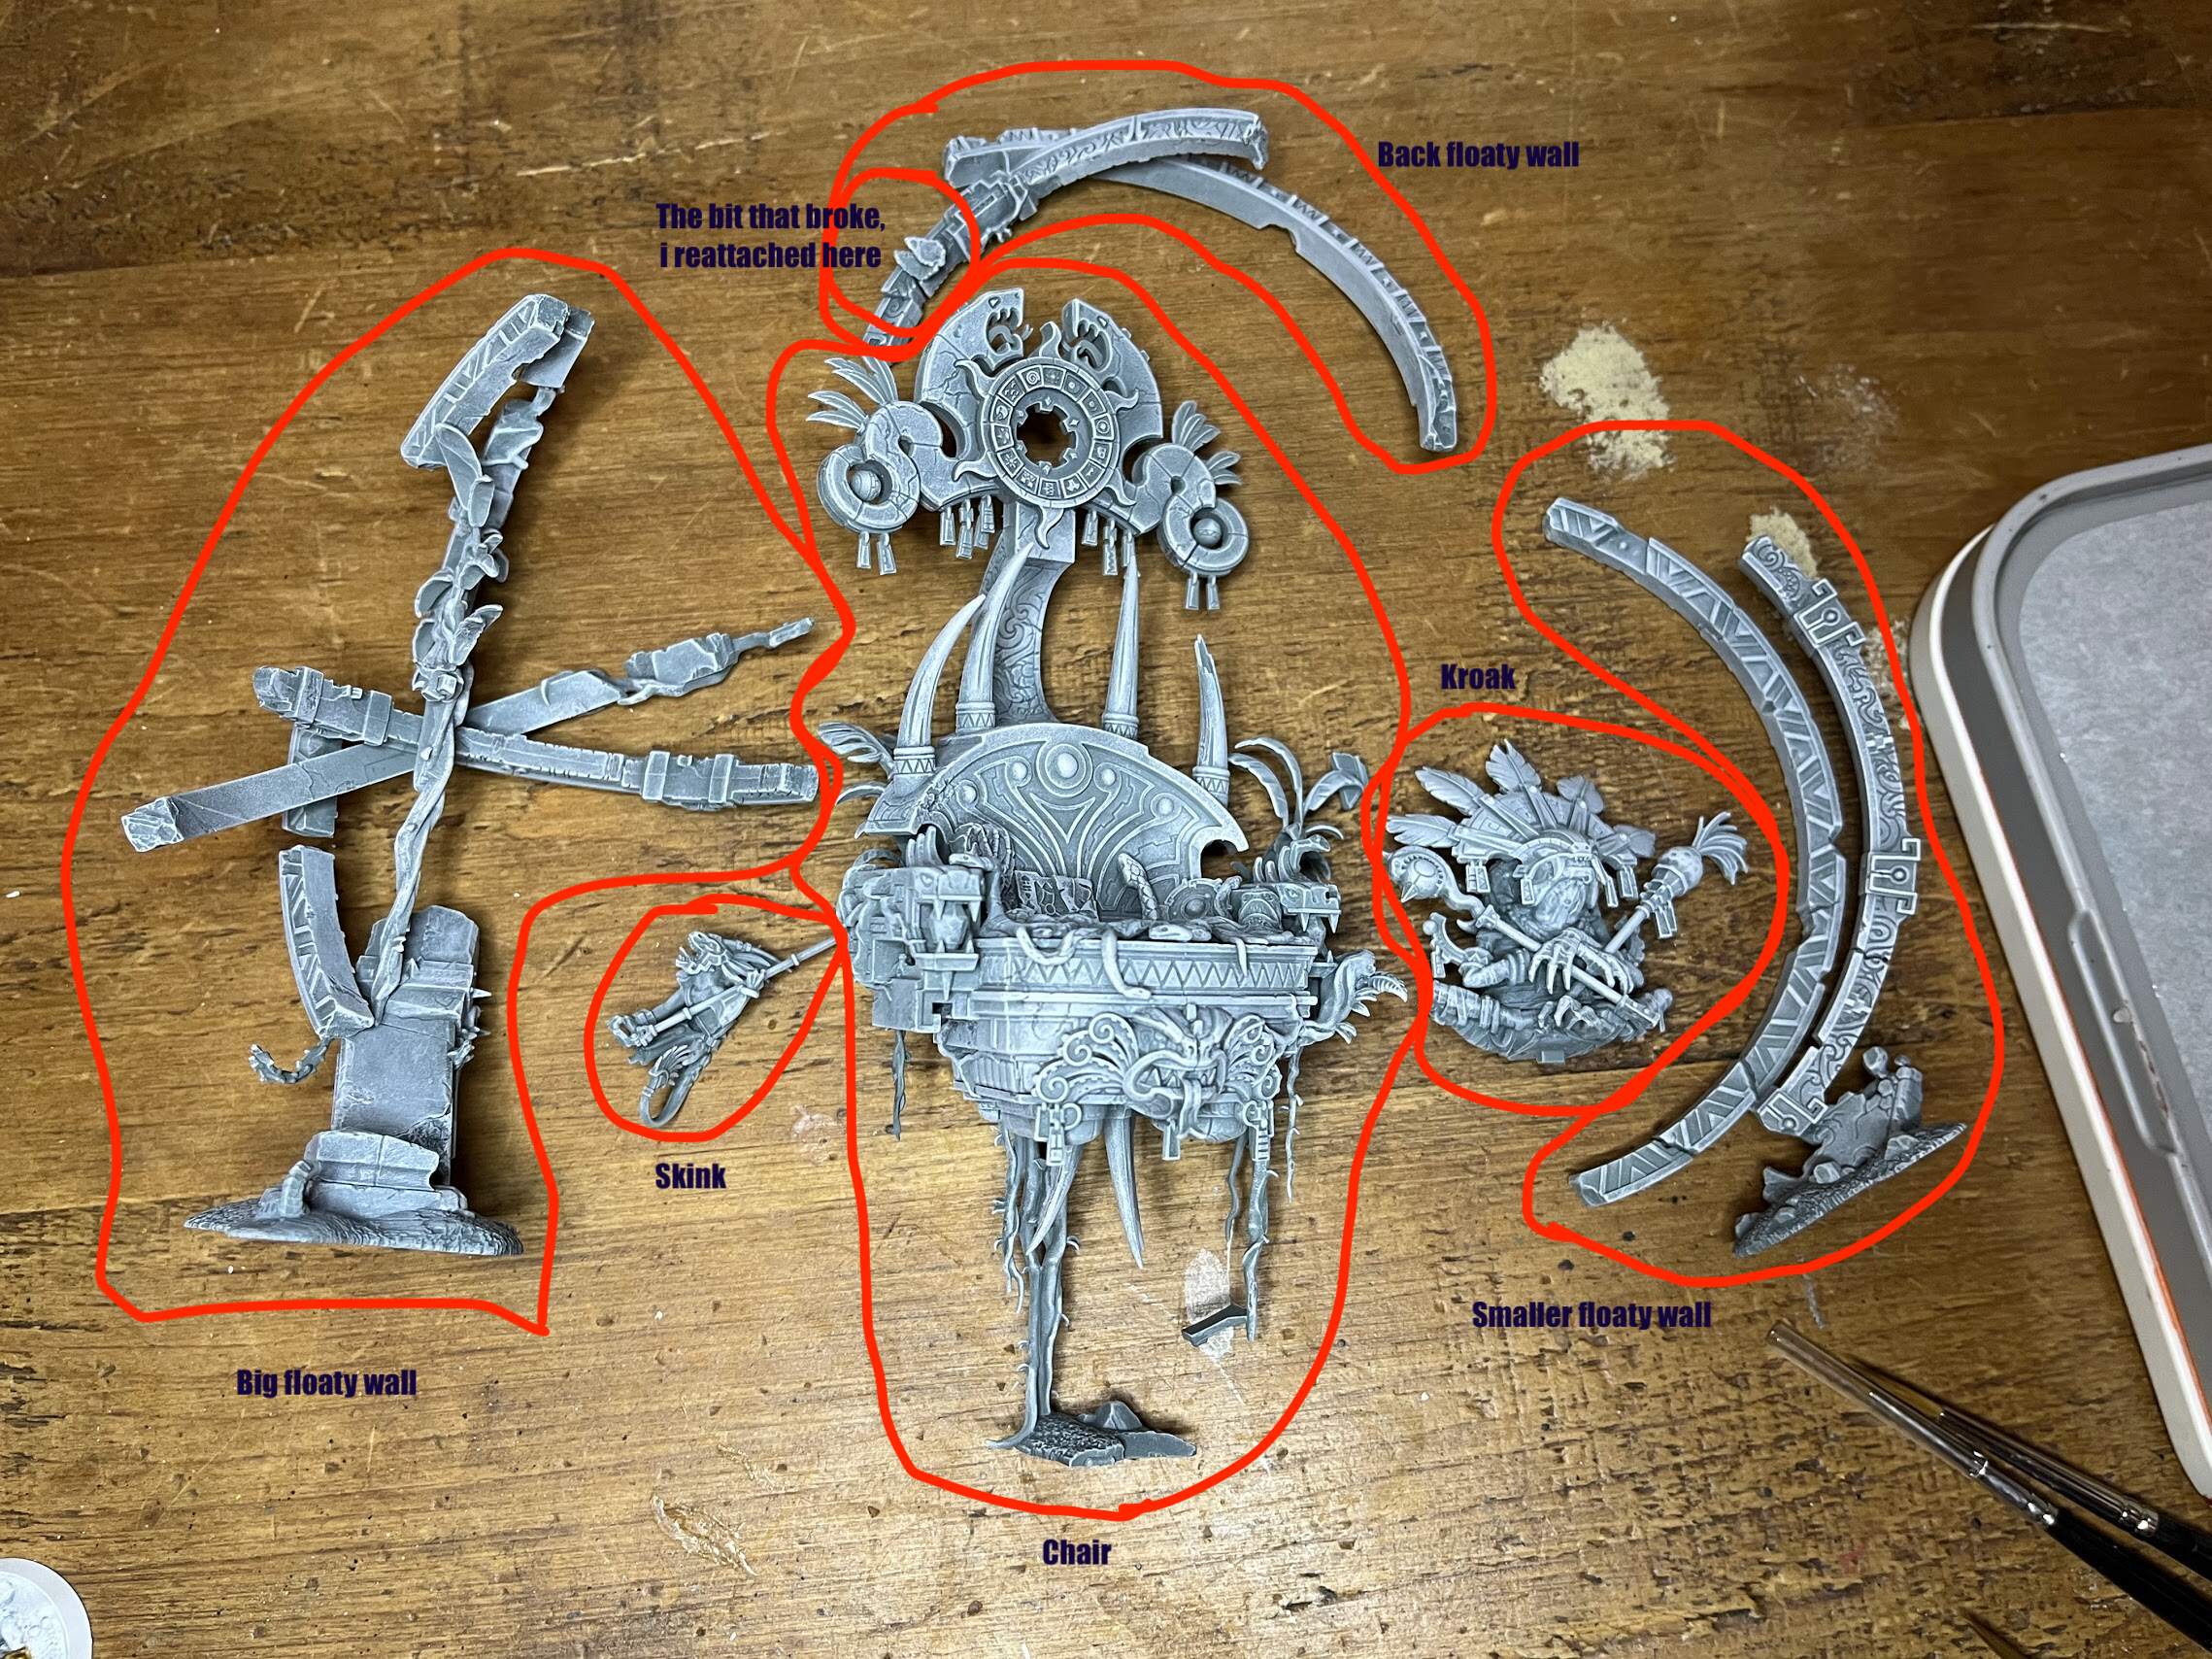
I plan to do this as a multipart and put together each part after painting it, you can see the parts here:

Getting Ready for Slap Chop
I thought this model was going to be intimidating to build, but actually its pretty easy, it even makes some suggestions for a multipart build in the instructions.
This model is delicate, not quite as delicate as it looks, but is still delicate enough. I actually broke it :(
In good news! I actually prefer the multi part with it snapped… so have not re-attached it yet.
Slap Chop Base
To get ready for contrast I decided to slap chop. I based it using Mechanicus Standard Grey spray, I actually did this whiilst it was on the sprue before clipping off, but you could do it once the bits are built.
I then built it into its seperate parts:
- Kroak
- Chair
- Skink
- Big floaty rocks
- Smaller but still quite big floaty rocks
- Floaty rocks that go behind the chair
Once these were glued together I gave it a heavy dry brush of Grey Seer to give it the contrast. I then gave it a light drybrush of Corax White all over, but focusing on the raised areas.
This took a surprisingly long time and this was when I broke him :( So be careful folks!

And rest…
And thats it for part 1. Kroak looking pretty good and ready for colour!